
4.2. The GitHub Interface and Markdown
In this module, we’ll get acquainted with GitHub interface-- the place where all the magic happens. You’ll also sign up for a GitHub account, and start getting your project online!
Format
Read, watch videos, use GitHub
Prerequisites
Have completed all previous sections and modules
Materials
a computer, an internet connection, and a free GitHub account
The GitHub Interface
Probably the easiest way to get to know the GitHub interface is to click around it a bit. We’ll do that in the video below to give you a preview, but you should explore on your own when you get your account set up in the assignment that follows.
The GitHub Interface, Abby Cabunoc Mayes
Using Markdown
In the previous video, you saw lots of documents and issues (those bits of information about work that needs to be done). Some of these files and issues included links, images, and emoticons. These documents were formatted using a handy system called “markdown” designed to make any document more organized and readable for display on the web. When you use markdown you are adding a bit of extra notation to your text file. This Markdown notation instructs your web browser how to display the text– where to bold or italicize text, create lists, embed an image or a link, etc. Markdown is very much like HTML, the language of the web, in that it lets you easily create and display text in different ways online.
Here are some examples of how you can use Markdown.
#creates a top-level heading, like a title. (e.g.# My README File)##through######create sub-headings like those you might use for different chapters or sections within a larger document. (e.g.## Part 1: Project Description)*makes text bold or strong. (e.g.*Key vocabulary*)**makes text italic or emphasized. (e.g.The **internet** is a network of computers.)-creates a list item. (e.g.- First, click on the file called readme.md.)- [ ]creates a checklist item (e.g.- [ ] Draft contributor guidelines.)- Any number starts a numbered list.
- You format links like this:
[text](link). (e.g.Visit [our teaching activities page]([https://teach.mozilla.org](https://teach.mozilla.org)).) - You format images like this:
. (e.g.).
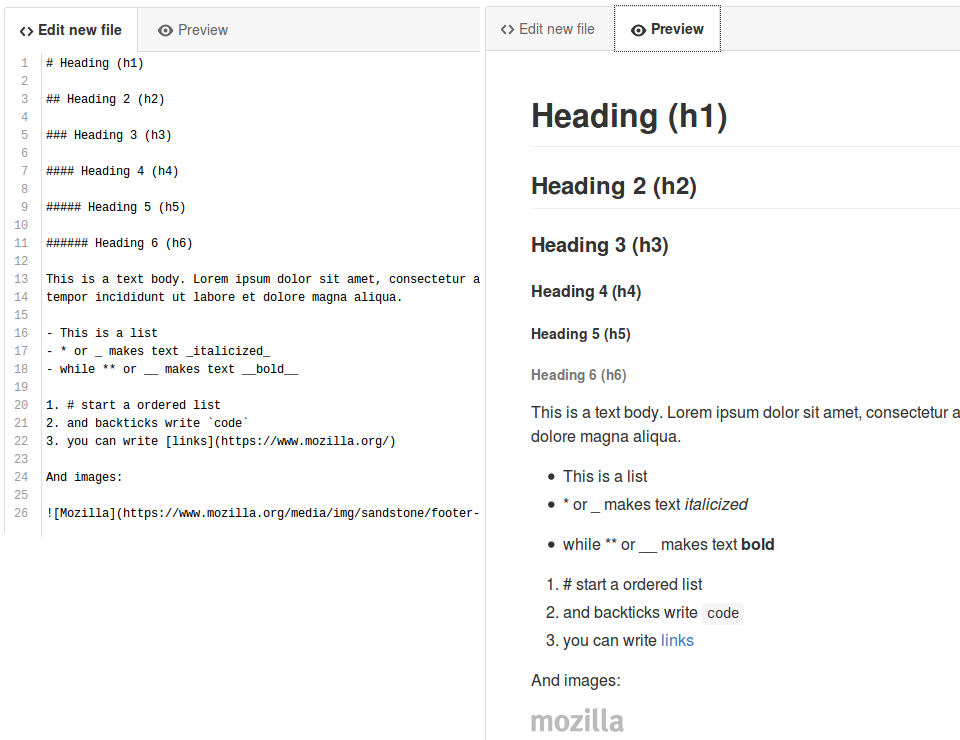
You can preview the message you write before sending using the preview tab in the markdown editor.
Find more documentation on using Markdown on Daring Fireball, and GitHub has its own markdown documented here. There are also tools like MacDown that show live previews to make writing Markdown easier.
Assignment: Get on GitHub!
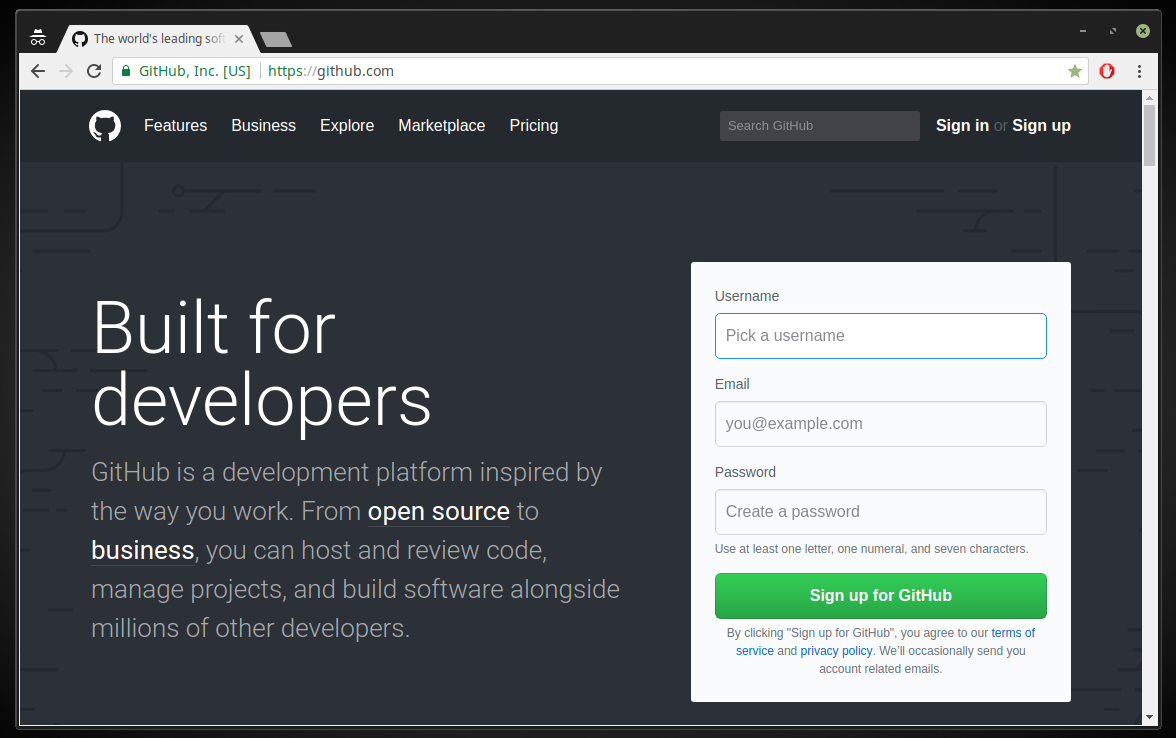
1.Sign up. Start by signing up with Github Online. You’ll be creating a new account, and joining the larger GitHub community of people working openly. Access the site https://github.com and fill the form of sign up for GitHub.
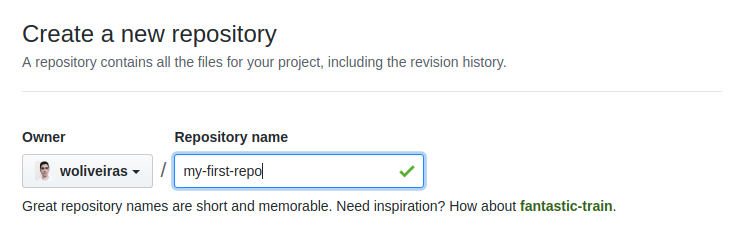
2.Create a Repository, or place to store all your working files . Every project starts by creating a new repository.

2.1. Create a project title. Good practice is to either use dashes (“-“) or underscores (“_”) between words in your title (e.g. my-first-repo or my_first_repo), in the same way you might structure a file name on your desktop. Computers read continuous names more easily than ones punctuated by spaces, so it’s nice to reinforce that convention in your file names. You can change the name of this repo later on (under the settings tab) if need be, but if you’re working with a community of contributors it’s best to keep your naming conventions consistent to avoid confusion.
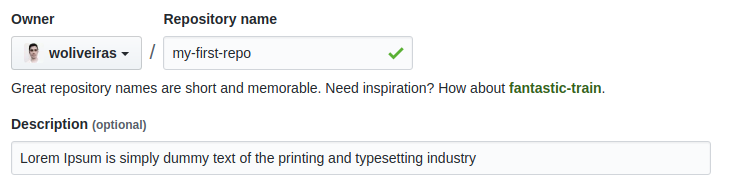
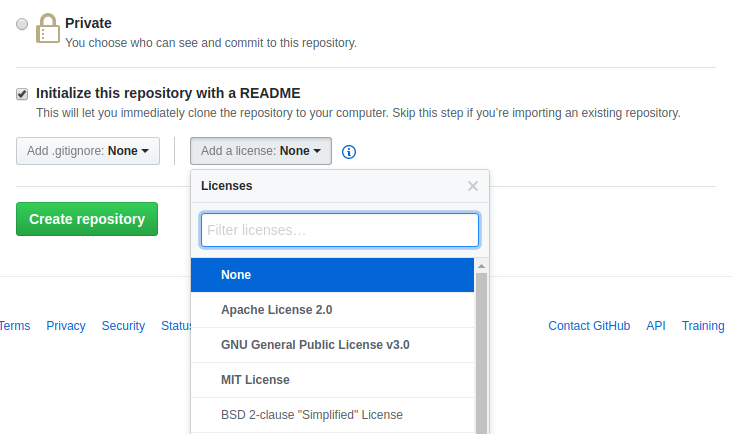
2.2. Write a short description of your repository in the space provided.
2.3. Initialize your repo with a README: check the box the box in the interface to add your very first file, a README, to your brand new repository. GitHub will generate a generic file containing the title and description you wrote in b, above. You’ll add more content to it in step 3, below. 2.4. Select a license. If you are sure what kind of license you want on your repo, select one here. If you’re not sure, don’t worry! Licences are covered in section 4.5, so you can skip selection for now and add a license after you’ve completed that section. 2.5. Click in the create repository button.
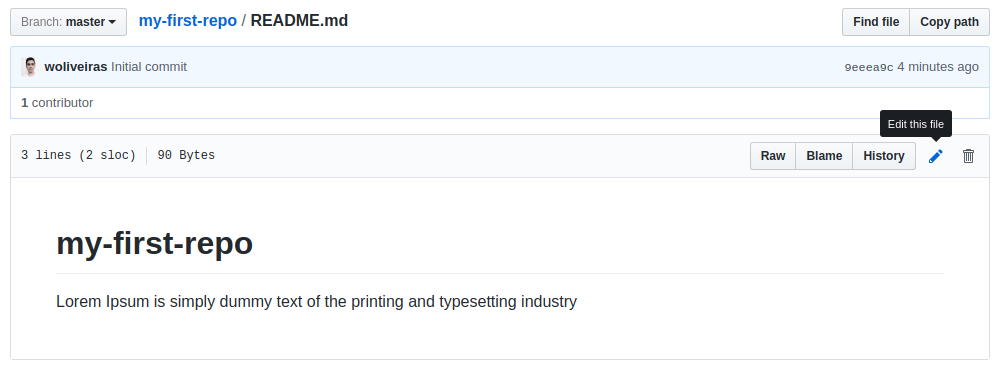
3.Your first commit. Let’s start by adding some content to your README.
3.1. Click on the README.md and then the edit button
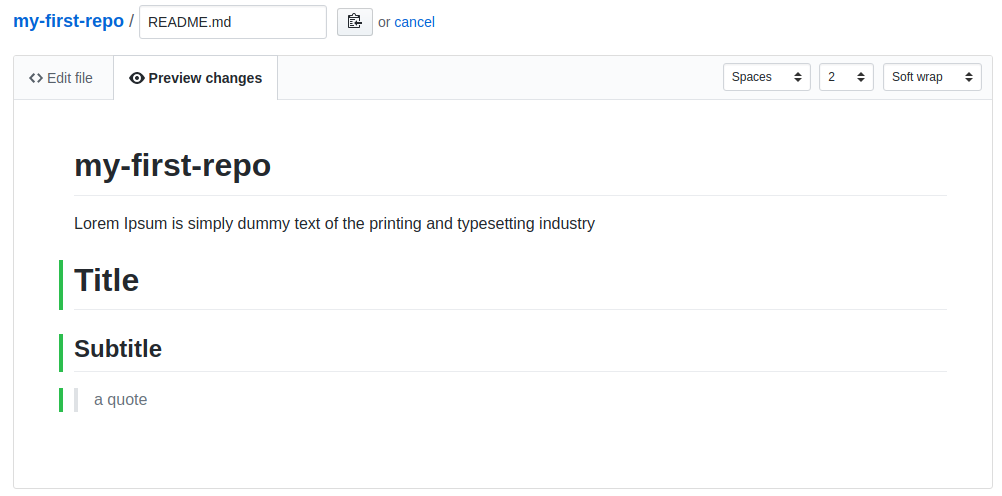
3.2. Using the README text you generated in the first module, add Markdown to create any headings, images, links, or lists you need. Note that you can toggle between editing (in markdown) and previewing the changes that markdown makes to the text.
3.3. Add a commit message - Your commit message should point to the changes that you’ve made (e.g. “added content to readme”) and press the commit button!
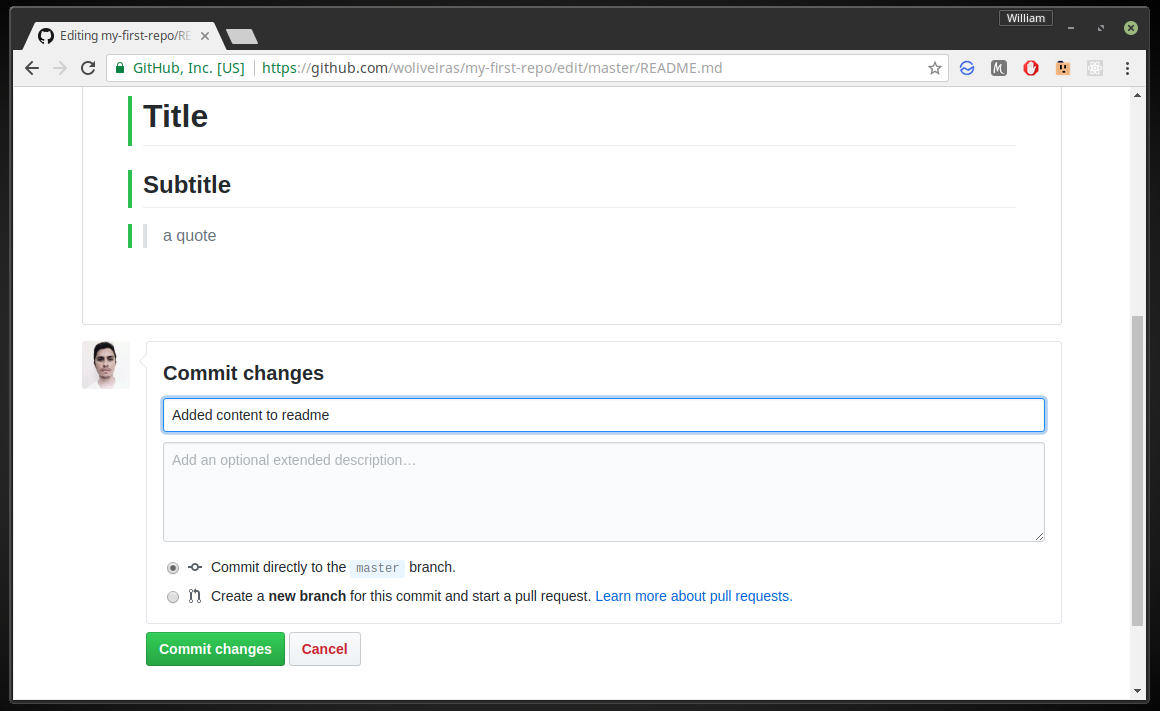
3.4. Hooray! You did it! 👏🏽✨🎉 Your first commit!
4.Now that you’ve added your first file, go ahead and add another– put your project Roadmap, which you created in Section 2, up on GitHub as well, using Markdown to format it, as in the previous step. Do the same with your Code Of Conduct and CONTRIBUTING files. Now your project is on the web and ready for collaboration!
next: Project Set-Up